1. Generating MongoDB Atlas Provider API Keys
In order to configure the authentication with the MongoDB Atlas provider, an API key must be generated.
We login to the MongoDB Atlas Portal and select our organization (or create a new organization, if we don't have one), then we select Access Manager, and we click the Create API Key button.

We enter a description for the API Key and select the Organization Project Creator permission.
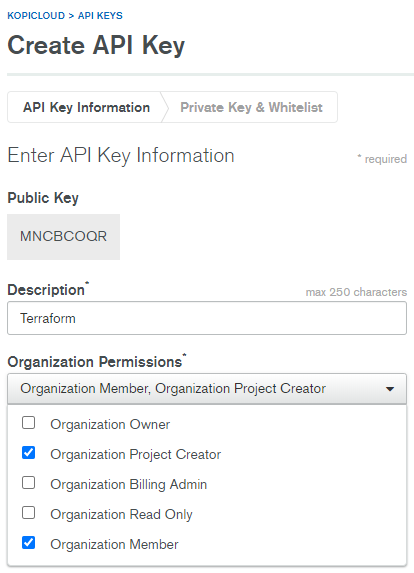
and copy the private API Key to a safe place:

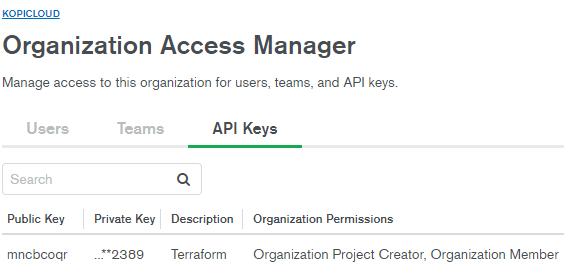
Finally, we can see our API Keys listed on the portal:
2. Configuring the MongoDB Atlas Provider
We will need to configure the MongoDB Atlas Provider using the API Keys generated on the previous step.
We have two options: using Static Credentials or Environment Variables.
2.1. Configuring the MongoDB Atlas Provider using Static Credentials
We create a file called provider-main.tf, used to configure both Terraform and MongoDB Atlas providers and add the following code:
# Define Terraform provider
terraform {
  required_version = ">= 0.12"
}# Define the MongoDB Atlas Provider
provider "mongodbatlas" {
  public_key  = var.atlas_public_key
  private_key = var.atlas_private_key
}
and create the file provider-variables.tf, to manage variables for providers:
variable "atlas_public_key" {
  type        = string
  description = "MongoDB Atlas Public Key"
}variable "atlas_private_key" {
  type        = string
  description = "MongoDB Atlas Private Key"
}
2.2. Configuring the MongoDB Atlas Provider using Environment Variables
We can also configure our API credentials via the environment variables, MONGODB_ATLAS_PUBLIC_KEY and MONGODB_ATLAS_PRIVATE_KEY, for our public and private MongoDB Atlas API key pair.
We create a file called provider.tf, used to configure both Terraform and MongoDB Atlas providers and add the following code:
# Define Terraform provider
terraform {
  required_version = ">= 0.12"
}# Define the MongoDB Atlas Provider
provider "mongodbatlas" {}
Usage:
$ export MONGODB_ATLAS_PUBLIC_KEY="mncbcoqr"
$ export MONGODB_ATLAS_PRIVATE_KEY="c35902a3-a047-9497-c2b3-341415372389"
$ terraform init
3. Creating a MongoDB Atlas Project
MongoDB Atlas Projects (also known as Groups) helps us to organize our projects and resources inside the organization.
To create a project using Terraform, we will need the MongoDB Atlas Organization ID and the Organization Owner or Organization Project Creator permissions (defined when we create the MongoDB Atlas Provider API Keys, on step 1).
3.1. Getting the Organization ID
In order to create a MongoDB Atlas project, we will need to get the Organization ID from the MongoDB Atlas portal.
We click on the Settings icon, located next to our organization name, and copy the Organization ID.

3.2. Creating a MongoDB Atlas Project using Terraform
Create a file atlas-main.tf and add the following code to create a project:
# Create a Project
resource "mongodbatlas_project" "atlas-project" {
  org_id = var.atlas_org_id
  name = var.atlas_project_name
}
and a file called atlas-variables.tf to manage the project variables:
# Atlas Organization ID
variable "atlas_org_id" {
  type        = string
  description = "Atlas organization id"
}# Atlas Project Name
variable "atlas_project_name" {
  type        = string
  description = "Atlas project name"
}
4. Creating a Database User
In this section, we will create a database user that will be applied to all MongoDB clusters within the project.
We can add multiple roles blocks to provide different levels of access to several databases to a single user.
Build-in MongoDB Roles or Privileges:
- atlasAdmin (Atlas admin)
- readWriteAnyDatabase (Read and write to any database)
- readAnyDatabase (Only read any database)
Custom Users Privileges:
- backup
- clusterMonitor
- dbAdmin
- dbAdminAnyDatabase
- enableSharding
- read
- readWrite
- readWriteAnyDatabase
- readAnyDatabase
Note: In Atlas deployments of MongoDB, the authentication database resource (auth_database_name) is always the admin database.
We add the following code to create a random password and a database user to the existing atlas-main.tf file:
# Create a Database Password
resource "random_password" "db-user-password" {
  length = 16
  special = true
  override_special = "_%@"
}# Create a Database User
resource "mongodbatlas_database_user" "db-user" {
  username = "galaxy-read"
  password = random_password.db-user-password.result
  project_id = mongodbatlas_project.atlas-project.id
  auth_database_name = "admin"  roles {
    role_name     = "read"
    database_name = "${var.atlas_project_name}-db"
  }
}
5. Granting IP Access to our MongoDB Atlas Project
We can use the mongodbatlas_project_ip_whitelist resource to grant access from IPs and CIDRs to clusters within the Project.
Note: we can use
cidr_blockorip_address. They are mutually exclusive.
Using CIDR Block
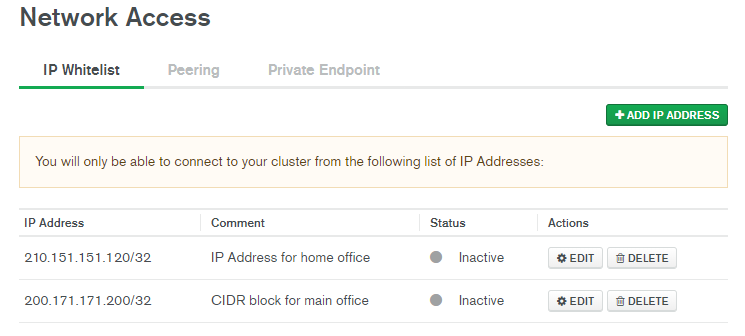
In the example below, we added the CIDR 200.171.171.200/32 to the project whitelist.
resource "mongodbatlas_project_ip_whitelist" "atlas-whitelist" {
  project_id = mongodbatlas_project.atlas-project.id
  cidr_block = "200.171.171.0/24"
  comment    = "CIDR block for main office"
}
Using the IP Address
In this example, we will use HTTP data resource to get our current IP Address and pass to the ip_address parameter.
# Get My IP Address
data "http" "myip" {
  url = "http://ipv4.icanhazip.com"
}# Whitelist my current IP address
resource "mongodbatlas_project_ip_whitelist" "project-whitelist-myip" {
  project_id = mongodbatlas_project.atlas-project.id
  ip_address = chomp(data.http.myip.body)
  comment    = "IP Address for home office"
}
This is the view of the IP Whitelist in the MongoDB Atlas Portal
6. Creating a MongoDB Atlas Cluster
In this section, we will use the mongodbatlas_cluster Terraform resource to create a Cluster resource. This resource lets us create, edit, and delete clusters.
Note: the MongoDB Atlas provider (and the Atlas API) don’t support the Free tier cluster creation (M0)
For specific details about the provider_instance_size_name and the provider_region_name, please check https://docs.atlas.mongodb.com/reference/google-gcp/
We add the following code to create a cluster to the existing atlas-main.tf file:
resource "mongodbatlas_cluster" "atlas-cluster" {
  project_id = mongodbatlas_project.atlas-project.id
  name = "${var.atlas_project_name}-${var.environment}-cluster"
  num_shards = 1  replication_factor = 3
  provider_backup_enabled = true
  auto_scaling_disk_gb_enabled = true
  mongo_db_major_version = "4.2"

  provider_name = "GCP"
  disk_size_gb = 40
  provider_instance_size_name = var.cluster_instance_size_name
  provider_region_name = var.atlas_region
}
and the following code to the existing atlas-variables.tf file:
# Atlas Project environment
variable "environment" {
  type        = string
  description = "The environment to be built"
}# Cluster instance size name
variable "cluster_instance_size_name" {
  type        = string
  description = "Cluster instance size name"
  default     = "M10"
}# Atlas region
variable "atlas_region" {
  type        = string
  description = "GCP region where resources will be created"
  default     = "WESTERN_EUROPE"
}
6. Creating the Input Definition Variables File
In the last step, we are going to create input definition variables file terraform.tfvars and add the following code to the file:
atlas_public_key = "mncbcoqr"
atlas_private_key = "c35902a3-a047-9497-c2b3-3414153723897"atlas_org_id = "5egaf79a8693fg52367876h3"
atlas_project_name = "galaxy"
environment = "dev"
cluster_instance_size_name = "M10"
cluster_location = "WESTERN_EUROPE"
7. Initializing the Terraform Stack
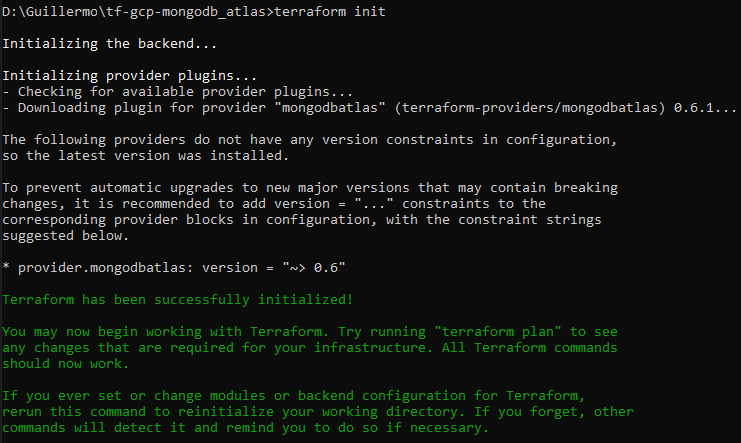
We open a command-line console as administrator, and type the following command: terraform init to initialize our Terraform stack.
